Let’s Get Creative!
3 creative and easy Do-It-Yourself projects to make the last few months of school much more interesting.
Are you tired of bland school supplies including notebooks, to-do lists, and bookmarks? If so, that is why I am here to give you 3 super easy, cute, and fun Do-It-Yourself school supply ideas to make the last few months of school enjoyable and interesting.
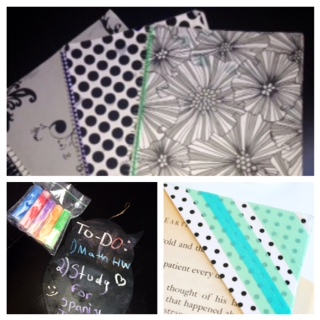
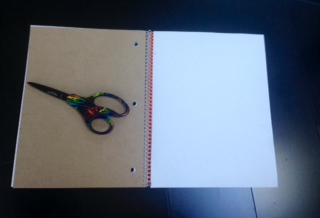
DIY #1 Notebook Covers
What you will need:
- notebook
- construction or scrapbook paper of your choice
- scissors
- super glue
- writing utensil
Step 1: Place the paper of your choice flipped where the white backside is showing, on top of your notebook.

Step 2: Mark where you need to cut the paper in order for it to fit onto the cover of your notebook.
Step 3: Cut along the lines.
Step 4: Then, simply glue it onto your notebook. Done!

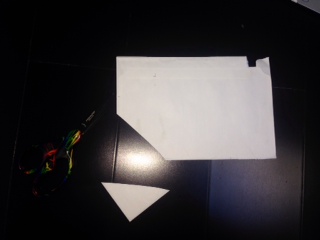
DIY #2 Bookmark
What you will need:
- envelope (old or new)
- washi tape
- scissors
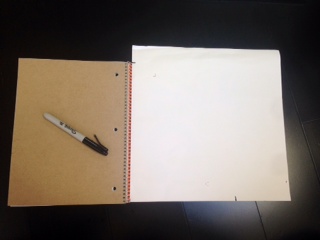
Step 1: Using your scissors cut one corner of your envelope off. If done correctly it should look like a little triangle shaped pocket. (look at picture shown below)
Step 2: Begin adding washi tape onto your triangle cut from the envelope in strips. Feel free to add it onto just one or both sides of the envelope pocket. Get creative with the colors and patterns!
Step 3: Cut off the excess tape.

Step 4: Now just place your new bookmark onto the corner of the page you left off on!

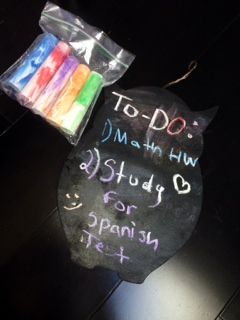
DIY #3 To-Do List
Are you tired of pencil and paper to-do lists? Well I have a solution for you.
What you will need:
- thin shaved piece of wood in shape of your choice (sold at craft stores)
- chalkboard spray paint
- chalk
Step 1: Begin by spraying your wood with your chalkboard spray paint (in a room with windows or outdoors).
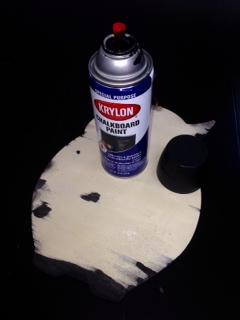
Step 2: Wait 3 hours and apply a even second coat.
Step 3: Wait about 15 hours to dry completely.
Step 4: Now just get your chalk and write! (erase with wet washcloth or paper towel).
Your donation will support the student journalists of West Bloomfield High School. Your contribution will allow us to purchase equipment and cover our annual website hosting costs.